Media Library
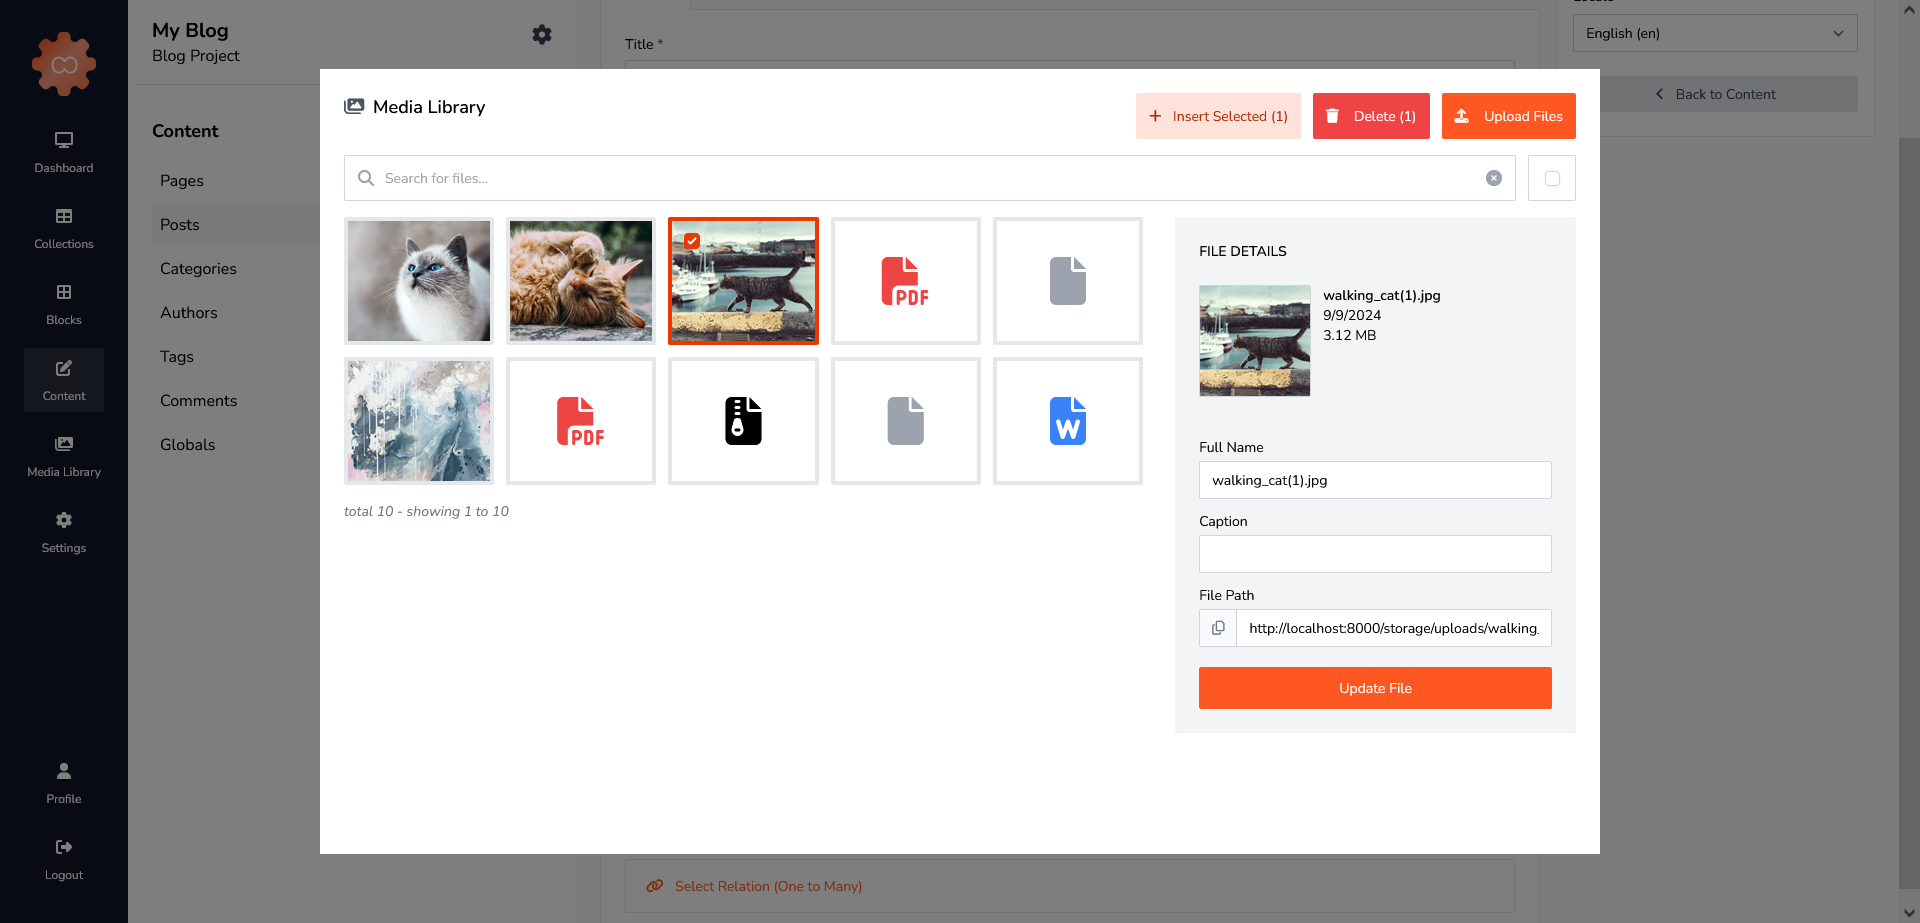
Managing project files is very easy with Elmapi's advanced Media Library. Upload your files and add them to your content.
TIP
You can set the maximum file size limit in your .env file

Amazon AWS S3 Upload
You can use AWS S3 to upload and retrieve media files. In order to configure Elmapi to use AWS S3 follow the instructions below.
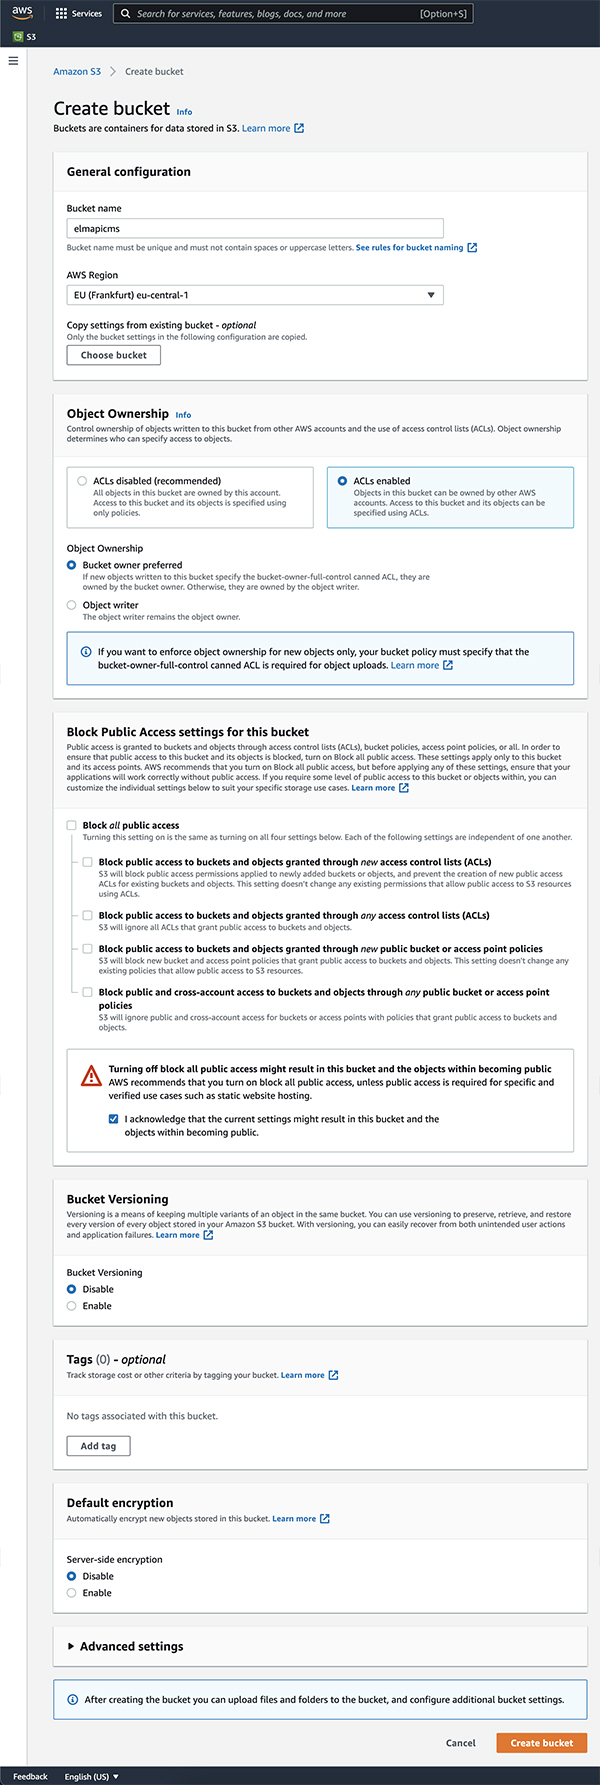
Step 1: Create a New S3 Bucket
If you want to use an existing bucket you can skip this part.
- Go to your AWS console
- Search for S3 and go to your S3 dashboard
- Go to Buckets
- Click on the Create Bucket button
- Choose your bucket name
- Choose bucket's region
- Select ACLs enabled
- Unselect Block all public access
- Check the option for acknowledging current settings
- Click on Create Bucket

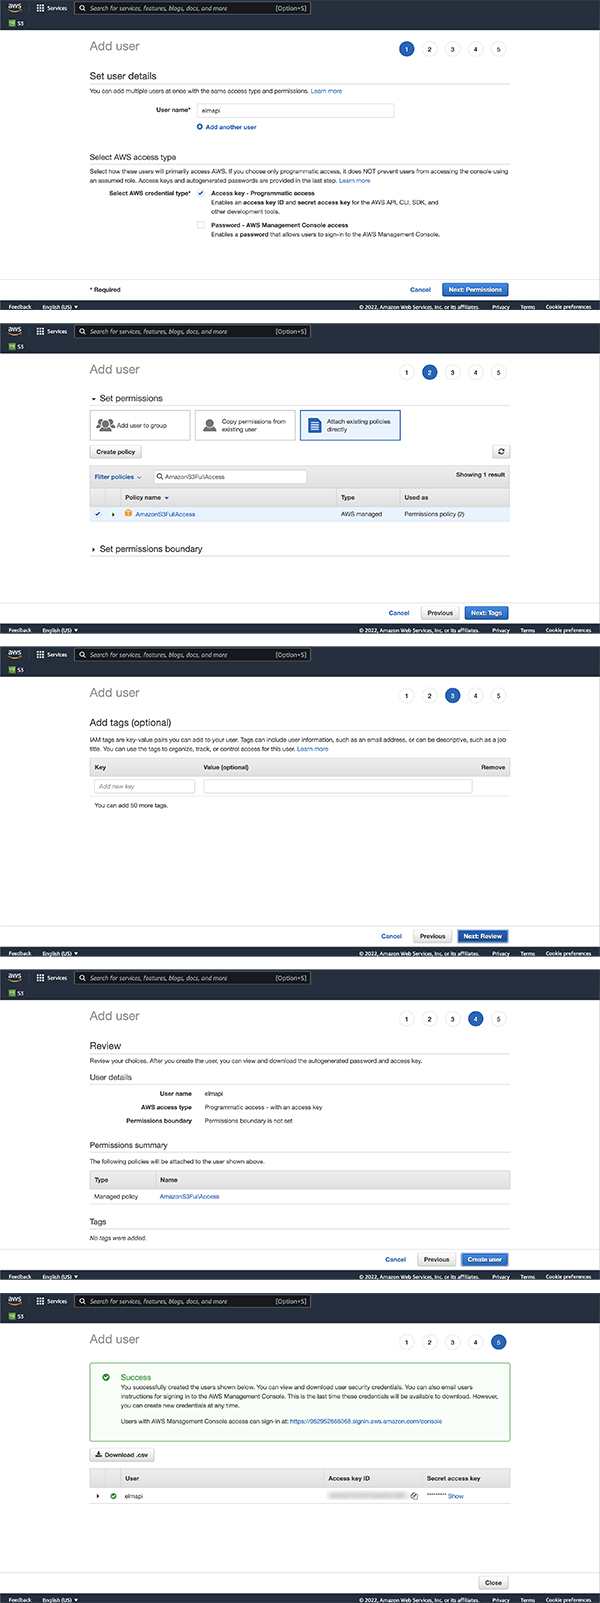
Step 2: Create a User
If you want to use an existing user you can skip this part.
- Go to your AWS console
- Search for IAM and go to your IAM dashboard
- Go to Users
- Click on the Add Users button
- Choose your user name
- Select Access key - Programmatic access
- Click on Next: Permissions
- Select Attach existing policies directly
- Search for and select AmazonS3FullAccess
- Click on Next: Tags
- Skip this step and click on Next: Review
- Click on Create User
- Copy your Access key ID and Secret access key

Step 3: Add Configuration
- Open your
.envfile. - Change the following lines according to your S3 credentials:
 AWS_ACCESS_KEY_ID=<your-access-key-id>
 AWS_SECRET_ACCESS_KEY=<your-secret-access-key>
 AWS_DEFAULT_REGION=<your-region>
 AWS_BUCKET=<your-bucket-name>
Step 4: Test the configuration
- Open your CoreCMSAPI dashboard.
- Go to project settings. You will see the Default Storage option
- Select AWS S3 and click on Update Project. You can change the default disk later if you want. When you change this option you can continue to access older files which stored in other option. You can have files in both disk at the same time.
- Go to project's Media Library.
- Click on Upload Files and upload your files as usual.
Access Denied Error

If you get an Access Denied error when you try to upload or access files to your S3 bucket, you need to grant the following permissions to your IAM user:
- PutObject
- GetObject
- ListBucket
You can find more information about this error in the AWS documentation.
Add Policy
You can also add a Policy to your bucket:
- Go to your bucket.
- Click on Permissions.
- Scroll to Bucket Policy section and Click on Edit.
- Add the following policy:json
{
 "Version": "2012-10-17",
 "Statement": [
     {
         "Sid": "PublicRead",
         "Effect": "Allow",
         "Principal": "*",
         "Action": [
             "s3:GetObject",
             "s3:GetObjectVersion"
         ],
         "Resource": "arn:aws:s3:::your-bucket-name/*"
     }
 ]
}